
OverviewOverview
The Data Sources tab allows you to choose which tables or views your report will pull data from. Your system administrator can set up the interface to simplify the data selection process, allowing for easier report creation and less time consumed trying to understand complex data models.
Tip: When the Distinct check box is selected the report will only return unique records. To locate this screen, navigate to System > Report Writer.
Choosing_a_Data_SourceTable_or_View?Table or View?
We recommend that you use a Reporting View prefixed by v_rpt. These views have most of the joins already defined and will not change with a new release. If a report requires a field not included in a reporting view, you can edit the view by adding additional tables or views as needed. These reporting views are located in the Reporting section of the Data Source tab in Simple mode. Please refer to the Simple Mode section below for more information.
Field_DescriptionsField Descriptions
<table data-table-width="760" data-layout="default" ac:local-id="0eb3fd7b-4ef4-4d64-b353-76631f156710"><colgroup><col style="width: 340.0px;"><col style="width: 340.0px;"></colgroup><tbody><tr><td><p><img src="https://xaftxntyjxdujkhgbatj.supabase.co/storage/v1/object/public/purview-attachments/44957737/att_1_for_44957737.png" alt="att_1_for_44957737.png"></p></td><td><p><span style="color: rgb(84,84,84);">Deletes the row the button is on.</span></p></td></tr><tr><td><p><img src="https://xaftxntyjxdujkhgbatj.supabase.co/storage/v1/object/public/purview-attachments/44957737/att_2_for_44957737.png" alt="att_2_for_44957737.png"></p><p></p></td><td><p><span style="color: rgb(84,84,84);">Inserts a row above the row the button is on.</span></p><p></p><p></p><p></p><p></p><p></p><p></p><p></p><p></p><p></p><p></p><p></p><p></p><p></p><p></p><p></p><p style="text-align: center;"></p></td></tr></tbody></table>
Inserts a row below the row the button is on.
Simple_ModeSimple Mode
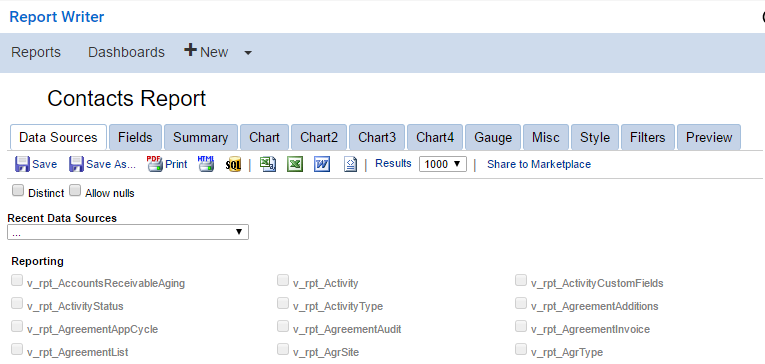
Simple mode is the default mode for the Data Sources tab. In this mode, tables and views are represented by check boxes that become enabled or disabled based on the primary keys. When you select one box, the tables that cannot be joined will be disabled automatically. After each data source is selected, the list of data sources that are valid candidates to join with will be refreshed. You may also select a data source from the Recent Data Sources drop-down.
After you have selected your data sources, continue building the report by clicking Continue to Fields at the bottom of the page or the Fields tab at the top of the page.
Advanced_ModeAdvanced Mode
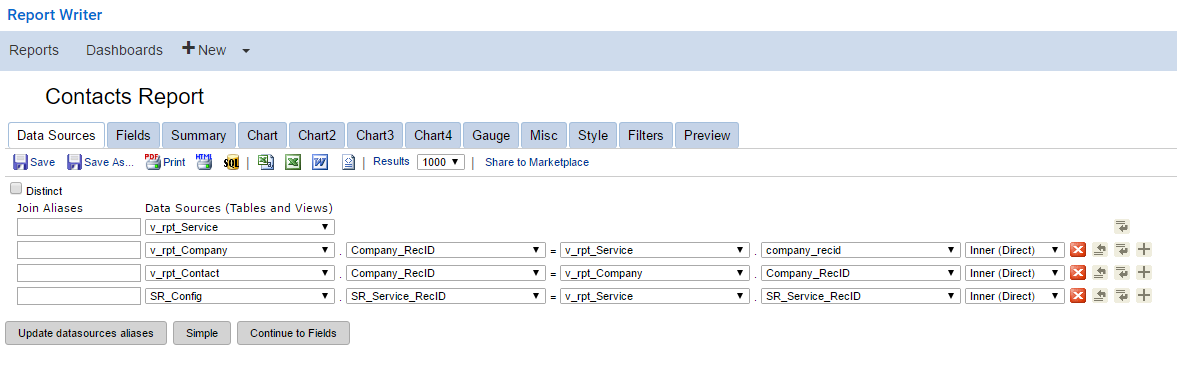
In Advanced mode, you must select the relationships that exist between the tables or views yourself by selecting a join type. To turn Advanced mode on, scroll to the bottom of the page and click Advanced. Use this mode only if you have a basic knowledge of database terminology.
Data sources are joined using the primary and foreign keys. Foreign keys are not required to have the same name as the primary key, but must possess a relationship that results in one or more selected rows when joined.
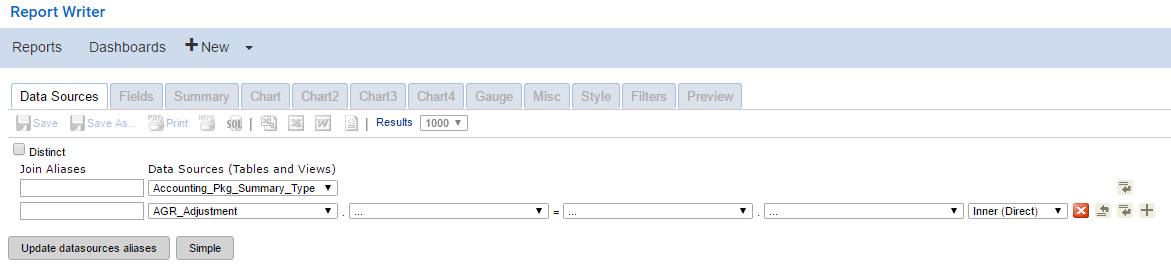
Tip: The Join Aliases text box enables you to provide an alias name for data sources that are used multiple times. This option is only available in Advanced mode.
Create_a_ReportCreate a Report
To create a report in Advanced mode:
-
Navigate to System > Report Writer and select New > Report.
- Click Advanced at the bottom of the page to turn on Advanced mode.
-
Select a data source from the Data Sources (Tables and Views) drop-down menu.
- Click Insert Row Below and select another data source. Four drop-down menus will appear. The Report
Designer will automatically attempt to find the appropriate keys and relationship, but the fields can be manually defined. All data sources will be available, even if they contain no corresponding data.
-
Select a Primary Key from the first drop-down menu. The primary drop-down lists all the fields for the data sources.
-
Select the table or view to join the table/view in the Foreign Table drop-down menu. The menu lists the tables and views that have been selected previously. To eliminate self-referential issues, the table or view listed in the drop-down on the current row is not included.
-
Select the Foreign Key from the third drop-down menu. The Foreign Key drop-down menu is a list of fields from the data source selected in step six.
-
Select from the Join field list of options to specify how your data sources will be associated and how data will be retrieved. Please see Join Types for more information on each type.
- Click Continue to Fields or the Fields tab to continue.
Join_Types_Join Types
The join type determines the relationship of the data sources selected. The join type drop-down menu is to the right of the foreign key field when joining Data Sources in Advanced Mode. By default, the Report Writer will perform an inner join for the selected data sources. Report Writer will perform an inner join when the menu is not shown. The table below describes the relationships that each join type creates.
<table data-table-width="760" data-layout="default" ac:local-id="3b633c2f-a52e-4425-b65c-1561a251e277"><colgroup><col style="width: 340.0px;"><col style="width: 340.0px;"></colgroup><tbody><tr><td><p>Inner (Direct)</p></td><td><p></p><p>Returns the data that the data sources have in common.</p></td></tr><tr><td><p>Cross</p></td><td><p>Returns data that combines each row from the first table with each row from the second table.</p></td></tr><tr><td><p>Left (First Exists)</p></td><td><p></p><p>Returns all data from the first data source and corresponding data from the second data source. A field in a result row will be null if the corresponding input table did not contain a matching row.</p></td></tr><tr><td><p></p><p>Right</p></td><td><p>Returns all data in the second data source and the corresponding data from the first data source. A field in a result row will be null if the corresponding input table did not contain a matching row.</p></td></tr><tr><td><p></p><p>Full</p></td><td><p>Returns all rows from both data sources. A field in a result row will be null if the corresponding input table did not contain a matching row.</p></td></tr><tr><td><p></p><p>Domain</p></td><td><p>Returns all domain rows from data sources in the same columns. Domain is rarely used but could be useful if you want to join tables on columns with web addresses.</p></td></tr></tbody></table>Creating_a_Custom_ViewCreating a Custom View
On-Premises can create their own views. We recommend that you create your own naming convention such as "v_mycompany" so that your company and ConnectWise can easily distinguish your custom views from the ConnectWise views.
Warning: Custom views, procedures, functions, and database objects in Report Writer are not supported by ConnectWise Support, Development, or your Assurance Agreement. ConnectWise makes no warranty or assurance that your database objects will function as expected in Report Writer.
Displaying_the_Custom_View_in_the_Data_SDisplaying the Custom View in the Data Sources Tab
The data source cache is refreshed upon creating a new report. If you already have an existing report that you want to use the new view in, go through the process of creating a new report, then reopen the existing report.