Full Title: Subscription Drop Processes (Non PFL)
Short Description: How to steps for completing subscription drop processes (not including PFL's - see separate tab)
Business Rules:
-
Title Insurance Regulatory Survey State Compliance Guides (TIRS)
-
Title Insurance Law Newsletters (TILN)
The drop process is a tool built in re:Members (formerly Impexium) that permits you to terminate products with a term in bulk by date range and product type. This process is needed in order for repeated purchases of the same products to reflect the start dates at time of purchase where there's a possible lapse, instead of picking up from the previous expiration date. The setup steps for running the drop process differs according to the product term and business rules (ex. grace periods, annual, monthly, etc). The steps below applies to subscriptions with different terms, expiration dates with the exception of PFL's and Membership Terms.
Text | Images | Step-By-Step:
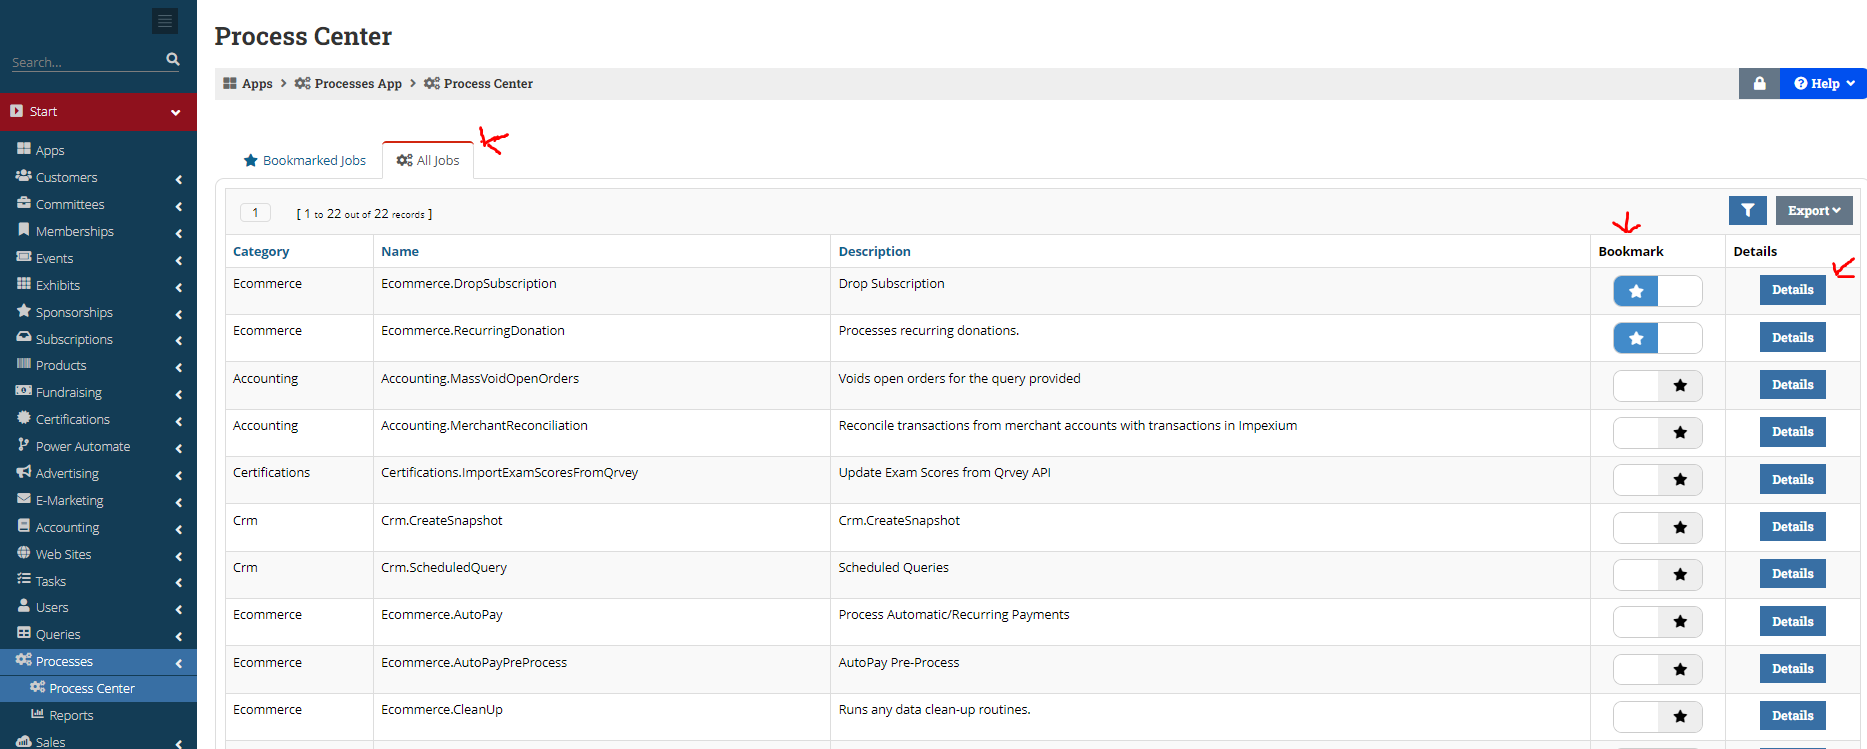
On the left hand app menu, select "Processes" and "Process Center". The processes are set up and coded in re:Members (formerly Impexium )as it pertains to specific products. Select the "All Jobs" tab to see the complete list of available processes. You have the option to customize your view of this list by bookmarking your processes. You can do so by selecting the star next to the desired process. If it is highlighted in grey and black, this indicates it is not bookmarked. If highlighted in blue and white, this indicates that it is bookmarked. This will allow you to filter out your desired processed under the "Bookmarked Jobs" tab.
Select "Details" next to the "Ecommerce.DropSubscription" process to review and start the drop process for your desired subscription. (see diagram below)
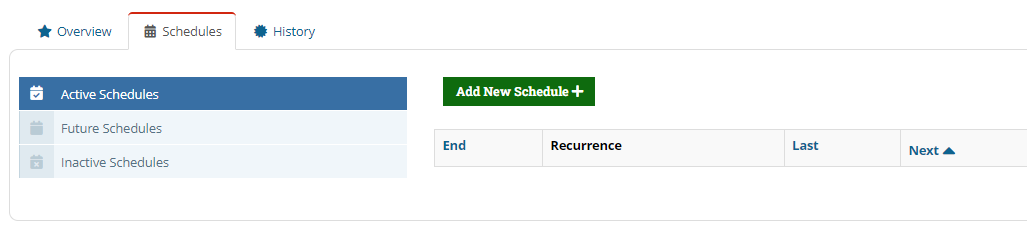
Next, select the "Schedules" tab, "Active Schedules" and the green "add new schedule" tab.
A menu will populate listing all applicable subscriptions to run this process for. Select your desired subscription(s). Next, Select the desired range of expiration dates for the specified members' subscription that you are requesting to terminate. If the expiration dates vary for the product subscribers, you have the option to select a range. NOTE: If applicable, make sure that you include the grace period dates. Set the date that you would like the official termination of the subscription to take place. You can use the current date or post date it. Not mandatory, but you can also enter a termination reason which will automatically create a note on the record pertaining to the termination. (Please send a ticket to Zendesk for requests to set up a new termination reason.)
Immediately following these steps, you can spot check to see the details of what records will be processed by selecting the "View Drop List" tab below. You can export this to a PDF or Excel spreadsheet for your records.
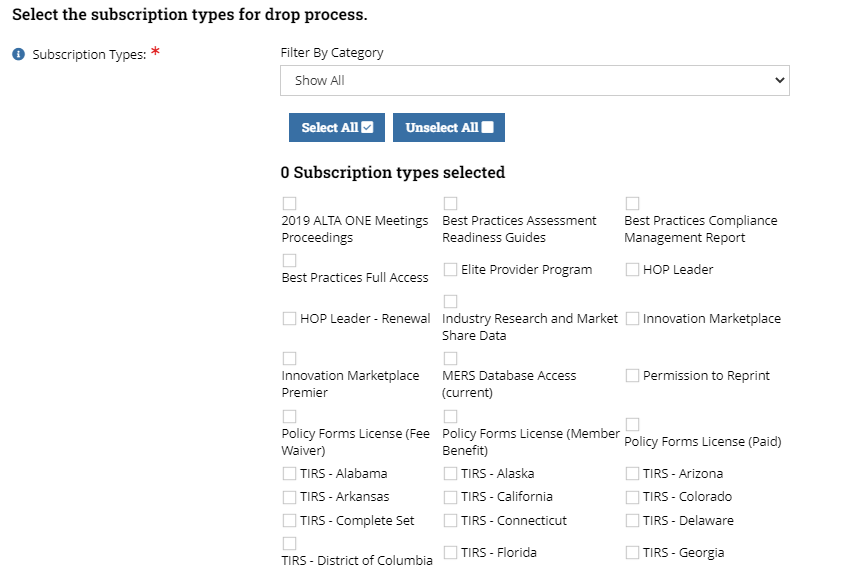
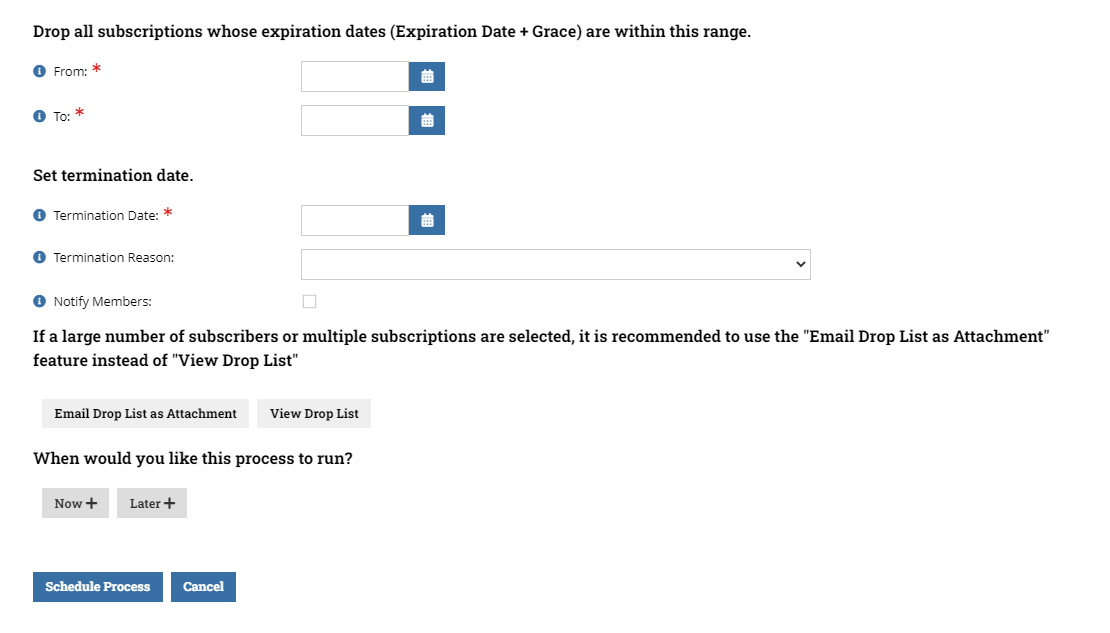
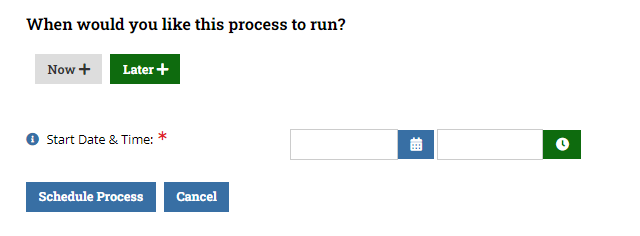
Final Step, schedule the date that you would like this process to run. You can set it to run immediately or have it ran in a future date. For immediate, Select "Now" or Select "Later" which will provide the prompt (in diagram below) to select the date and time that you would like this process ran.
When the set up process is complete, check the "Future Schedules" tab for any processes scheduled for a later date to confirm the set up is complete. For any processes that has been completed, select the "Inactive Schedules" tab to check the summary and status.
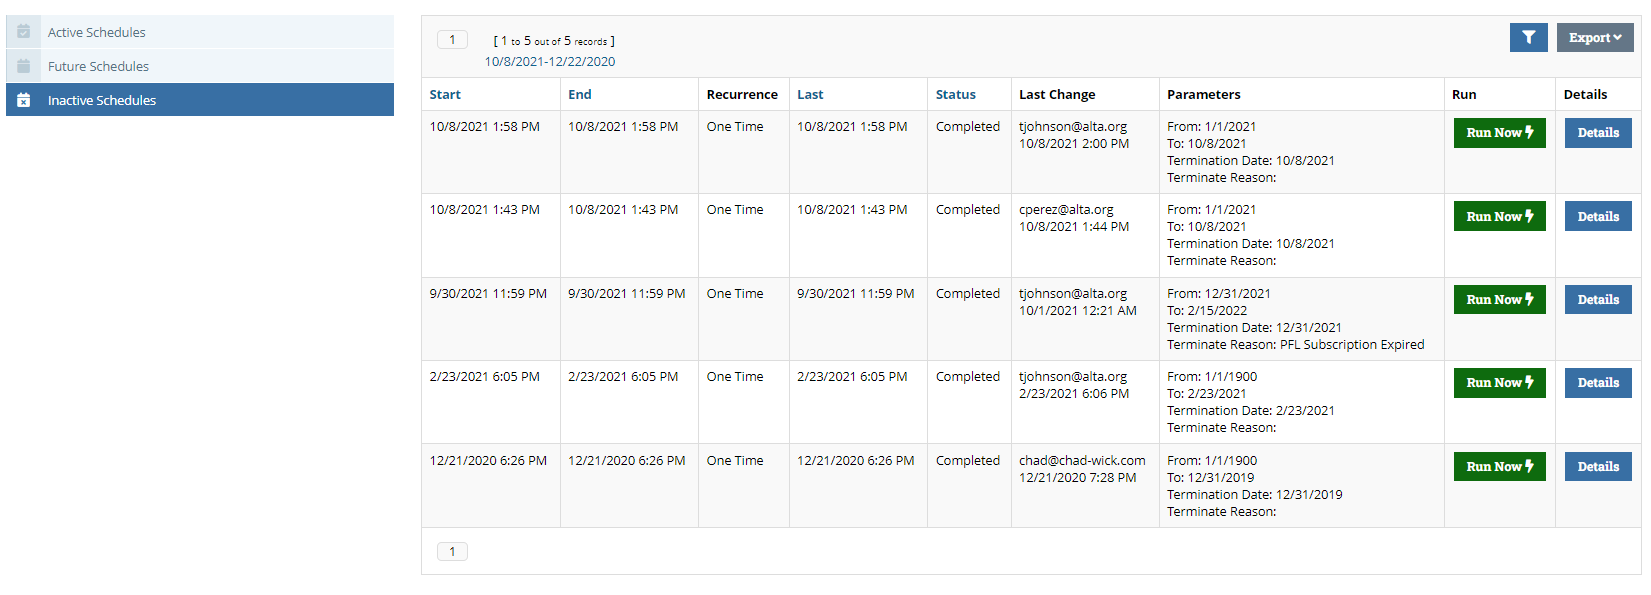
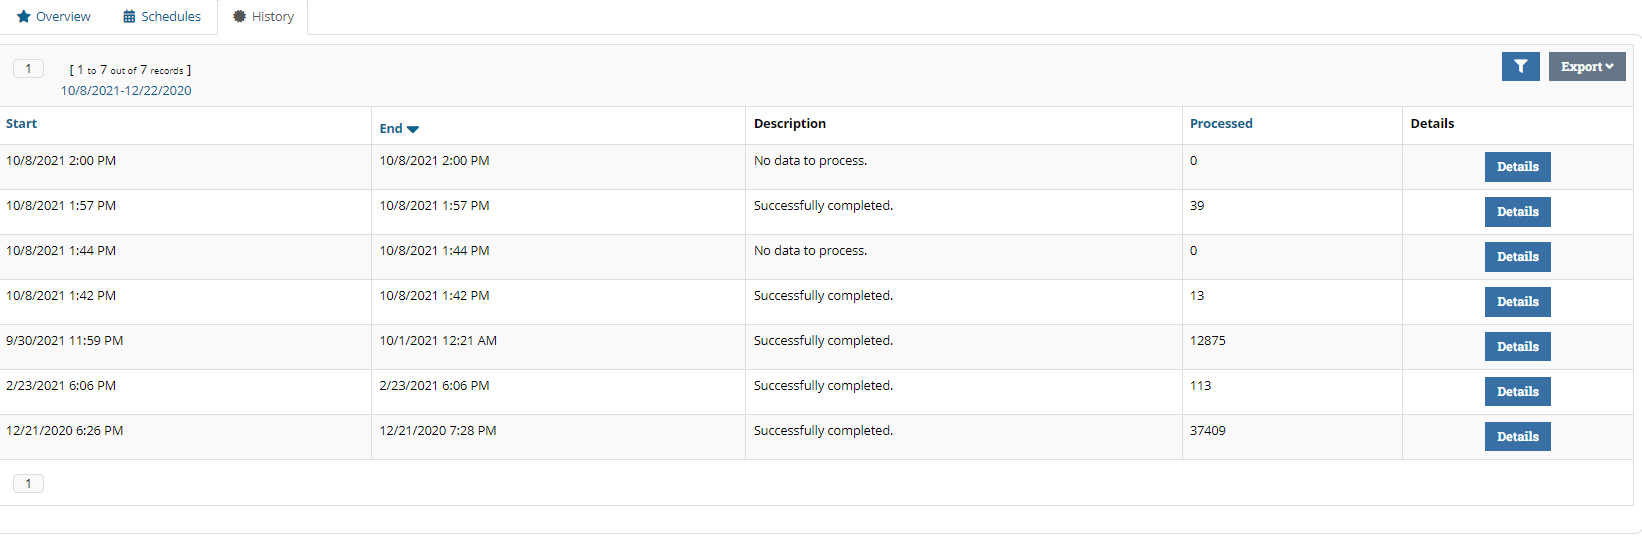
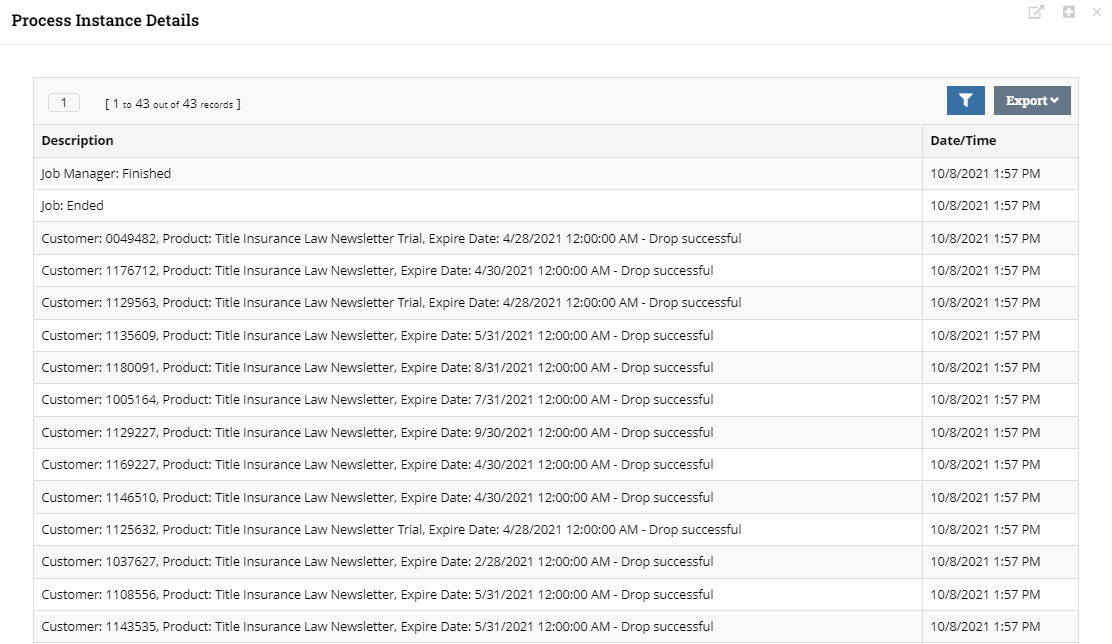
Under the "History" tab, you will be able to see a detailed status and report of what records were successfully terminated and the amount of records.