The exhibit hall floorplan is set up in re:Members (formerly Impexium) for vendors to be able to purchase booth spaces at ALTA meetings (SB and ONE). These are managed and maintained by the Vendor Relations department, and the IT department will assist with testing, importing, and setup.
If an exhibit hall is going to have a floorplan DWG file imported, this should be tested in Sandbox first. This is critical as if there are any errors in the import, re:Members (formerly Impexium) CANNOT delete things and it causes issue. So the system should be fully tested in Sandbox. More notes below in the Import section.
DWG Requirements
-
One layer with outline of the room with nothing outside of it (logo, key, etc.)
-
One layer with all Booth Outlines
- If there are two booth types, those should be exactly the same size and rotation.
-
One layer with all Booth Numbers
DWG Additional Layers
-
The outline layer can be complex or simple (walls, doorways, etc.)
-
Other layers (doors, arrows, tables, etc.) are fine, all will be shown, no option to include/exclude.
Testing DWG
-
Before Sandbox import, use online tool. It’s not perfect, but will shows outside the border, extra layers, etc in the PDF. https://cloudconvert.com/dwg-to-pdf
-
Test import and layers in Sandbox, no need to go past point of layers and seeing correct booths. https://alta.mpxsandbox.com/administration/
Exhibit and Hall Setup
To set up the exhibit hall in re:Members (formerly Impexium), select the “Exhibit” tab on the left hand menu and the “Exhibit” sub category.
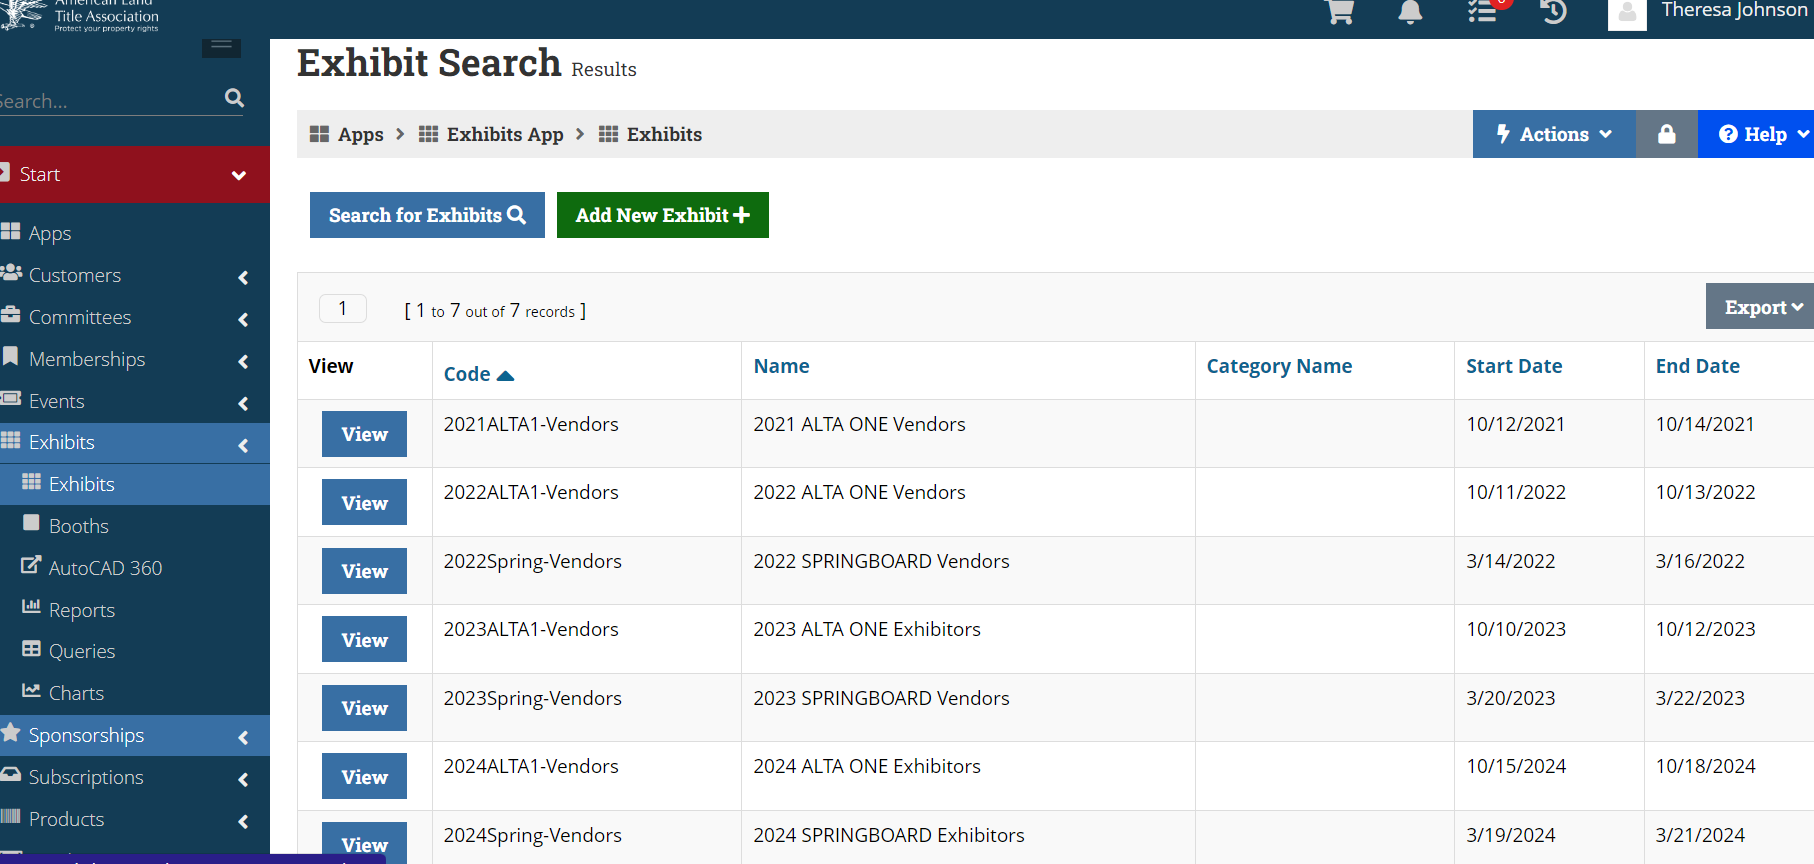
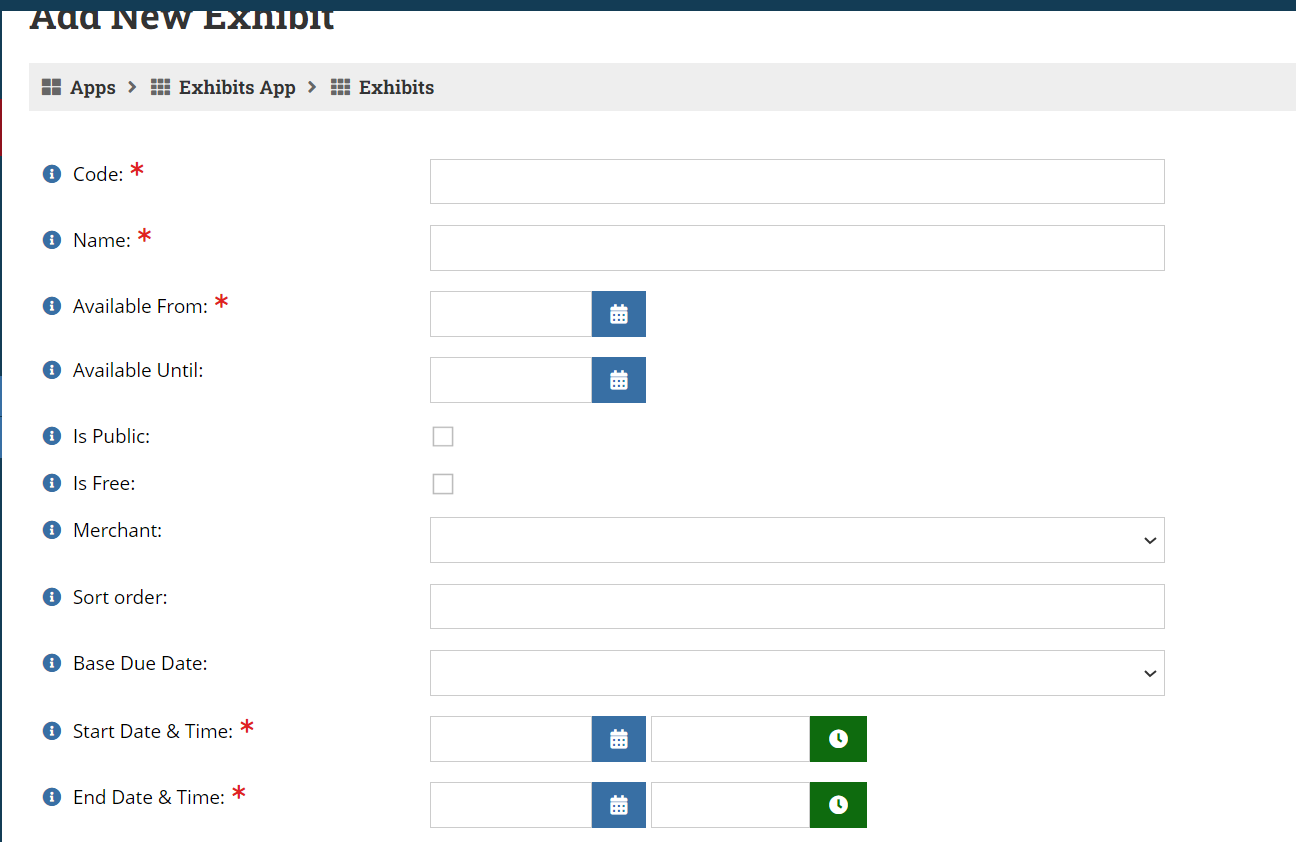
You can either locate the hall that you are uploading the floorplan for or create a new hall. To create a new hall, select “Add New Exhibit”. Create code according to the year and event the booth is being set up for. The “Available From” field should be marked as the current date. The “Start and End Date/Time” fields should reflect the times and dates of the actual meeting / event. Leave other fields blank and hit “save”. NOTE: DO NOT MARK PUBLIC!
A standard system should be used for both names and codes, with the Exhibit Code being the Meeting Code with “-Vendors” added to the end, and the Exhibit Name being the Meeting Name (which is YEAR+ALTA+NAME) followed by “Exhibitors”. In re:Members (formerly Impexium), while Codes CAN have spaces, ALTA’s convention is to not do that.
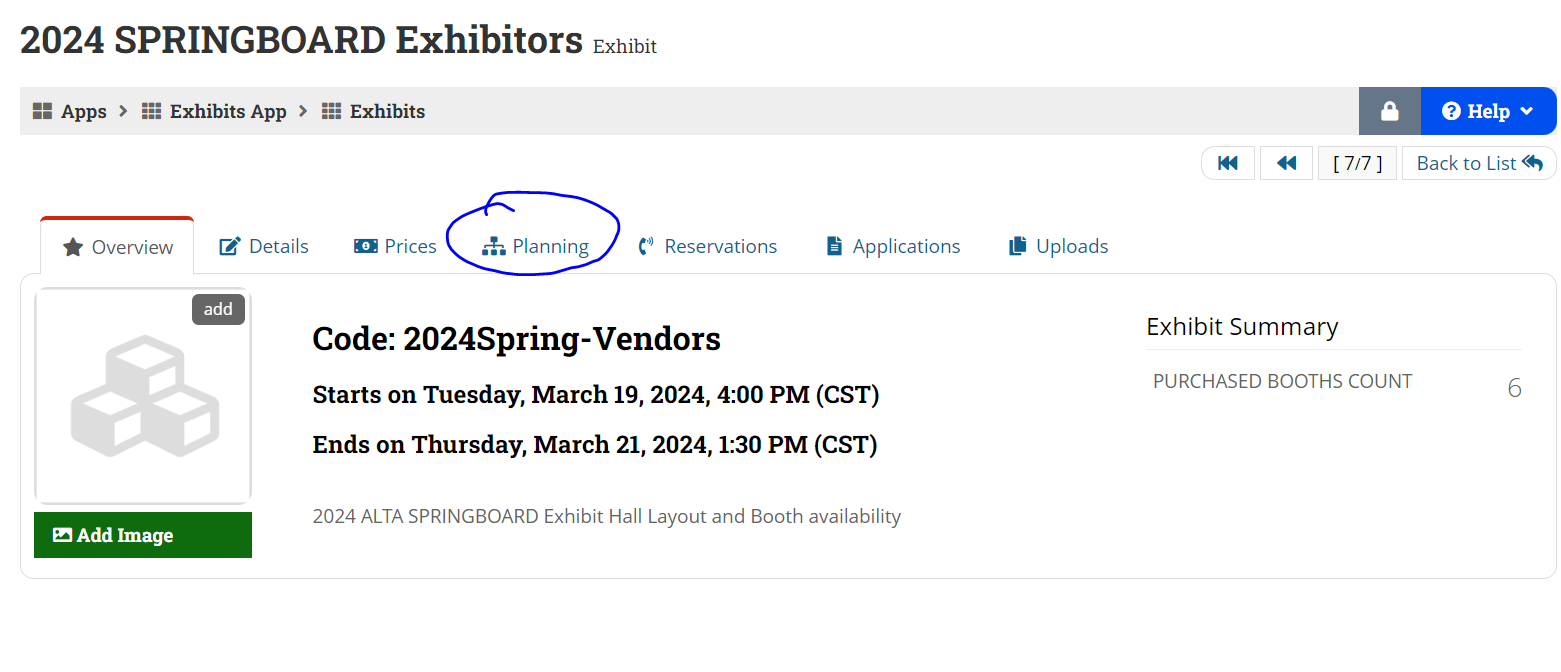
Once saved, you will be redirected to the list of all the exhibit halls set up. Select the green “view” tab next to the hall that you just created. This will take you to the overview screen of that specific hall. Select the “planning” tab. This is where you would need to go to upload the floorplan file. (Note: the floorplan file is a DWG file provided by our vendor Friedman that is sent to the Vendor Relations department.)
This is the step that must be done in Sandbox first to work through any issues since it cannot be easily deleted and correct in production.
Select the green “Add hall” tab. The following screen will pop up:
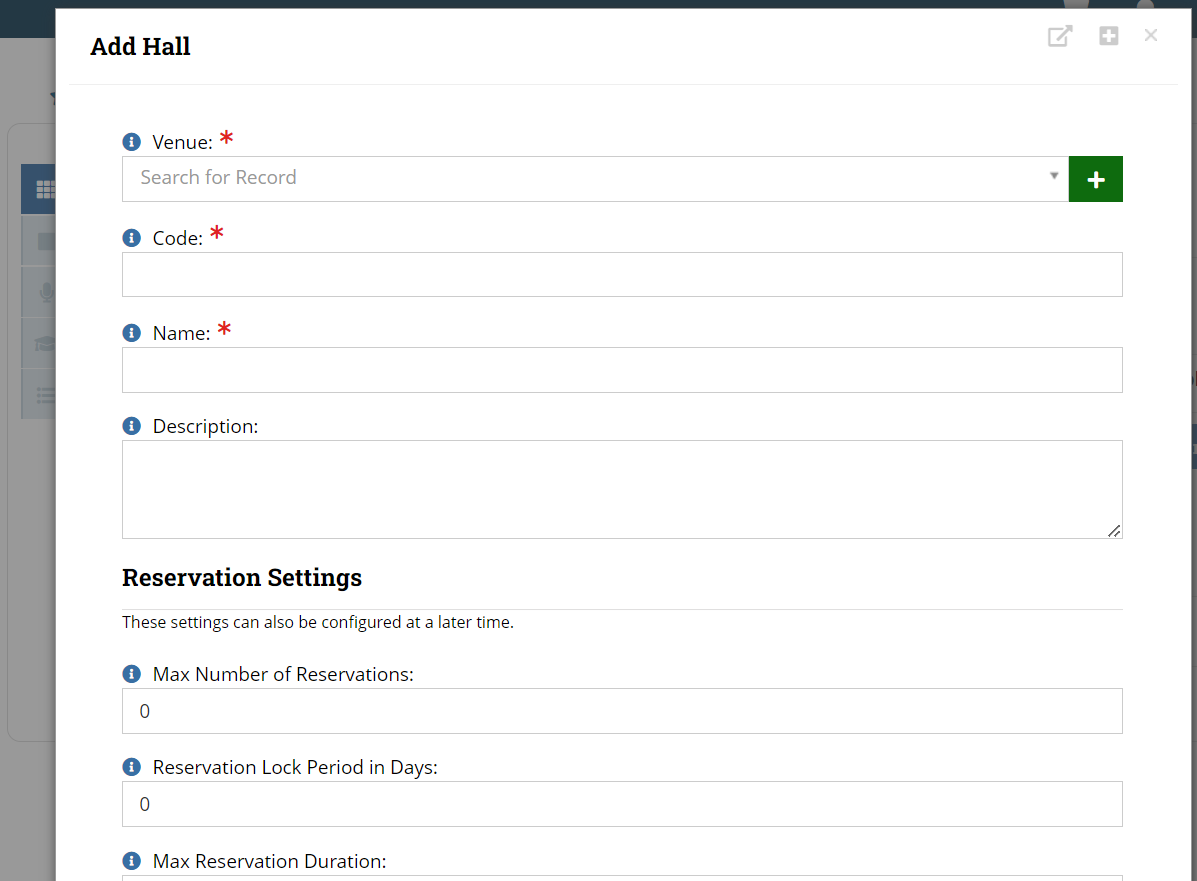
The venue should already be set up in re:Members (formerly Impexium) at the time of the meeting. You can do a search for the venue which is the hotel name where the meeting is being held. Enter the code and name that you created when initially adding the hall. (The year and event ex 2023ALTA1 Vendors, etc.) Hit “save”.
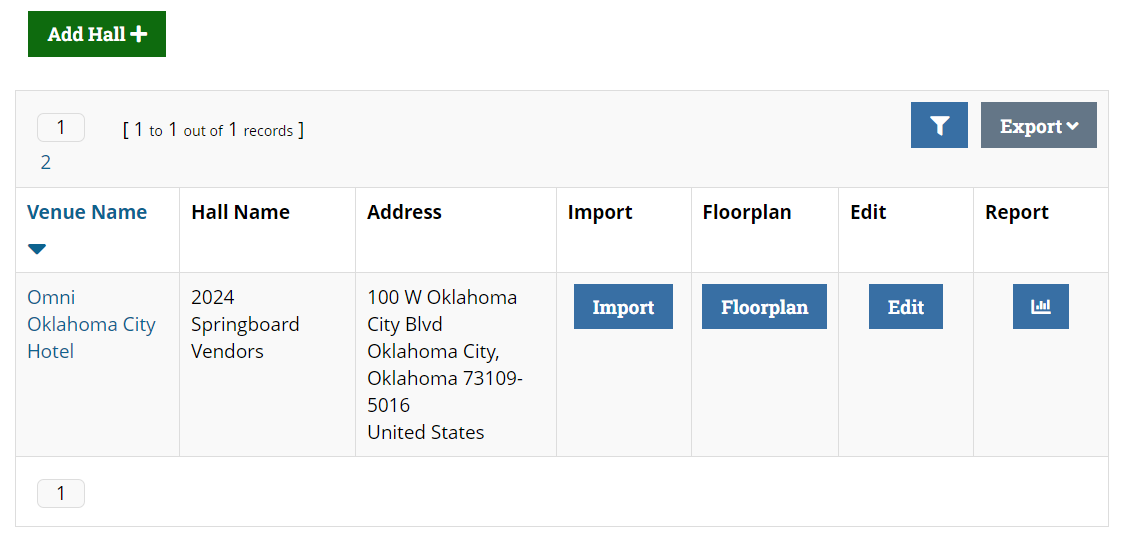
You will be redirected to the following venue screen below. Next to the venue name, select “import” to upload the DWG file.
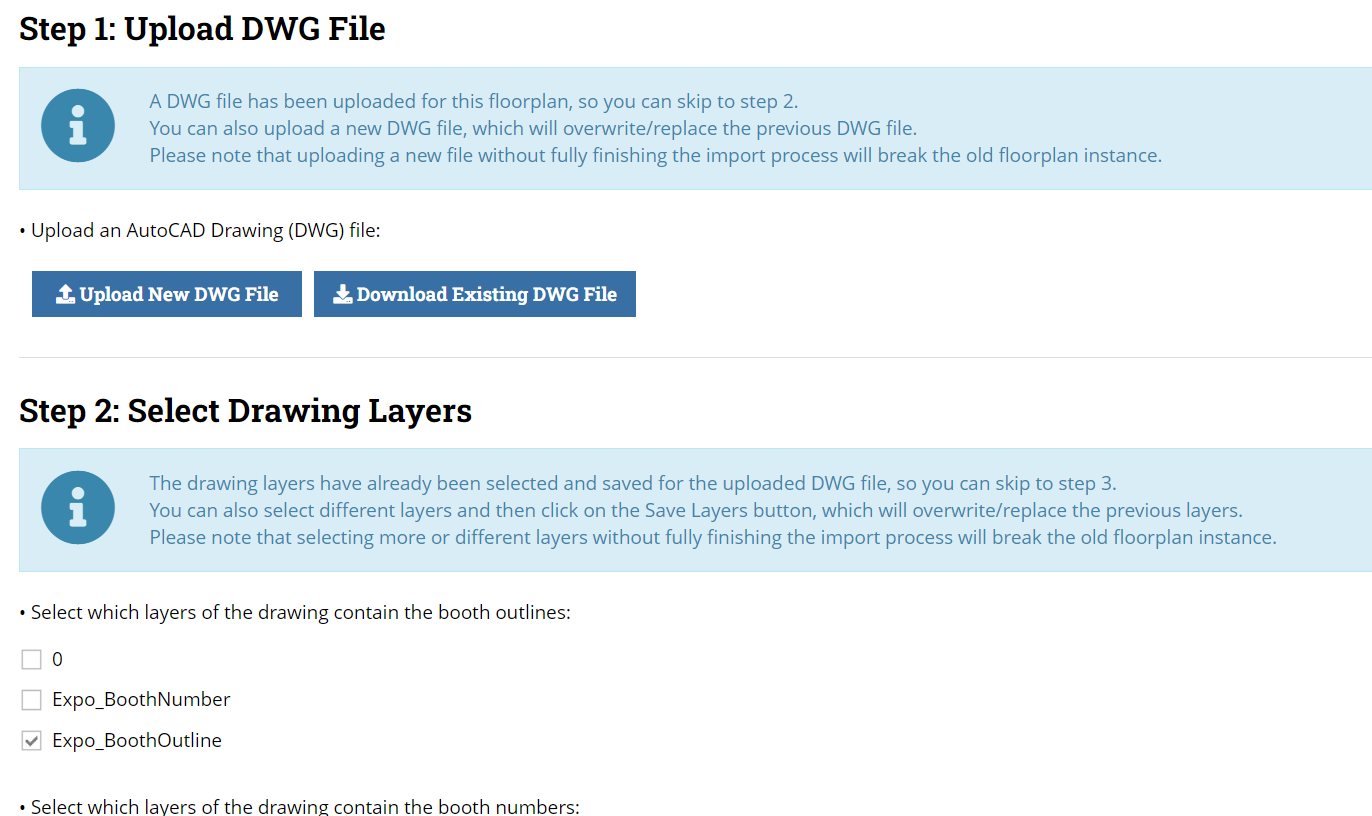
Step 1: Upload the file.
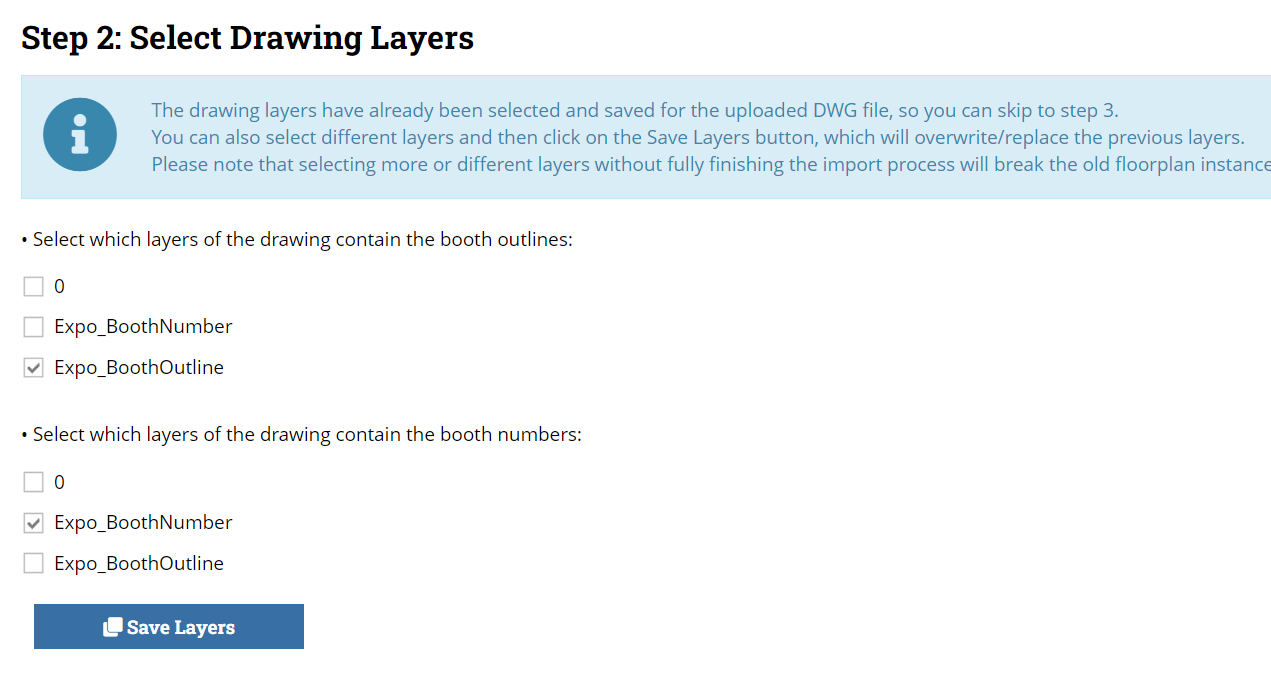
Step 2: Select the Drawing layers. The first layer should have the “Expo_BoothOutline” box checked. Second layer should have the “Expo_BoothNumber” box checked.
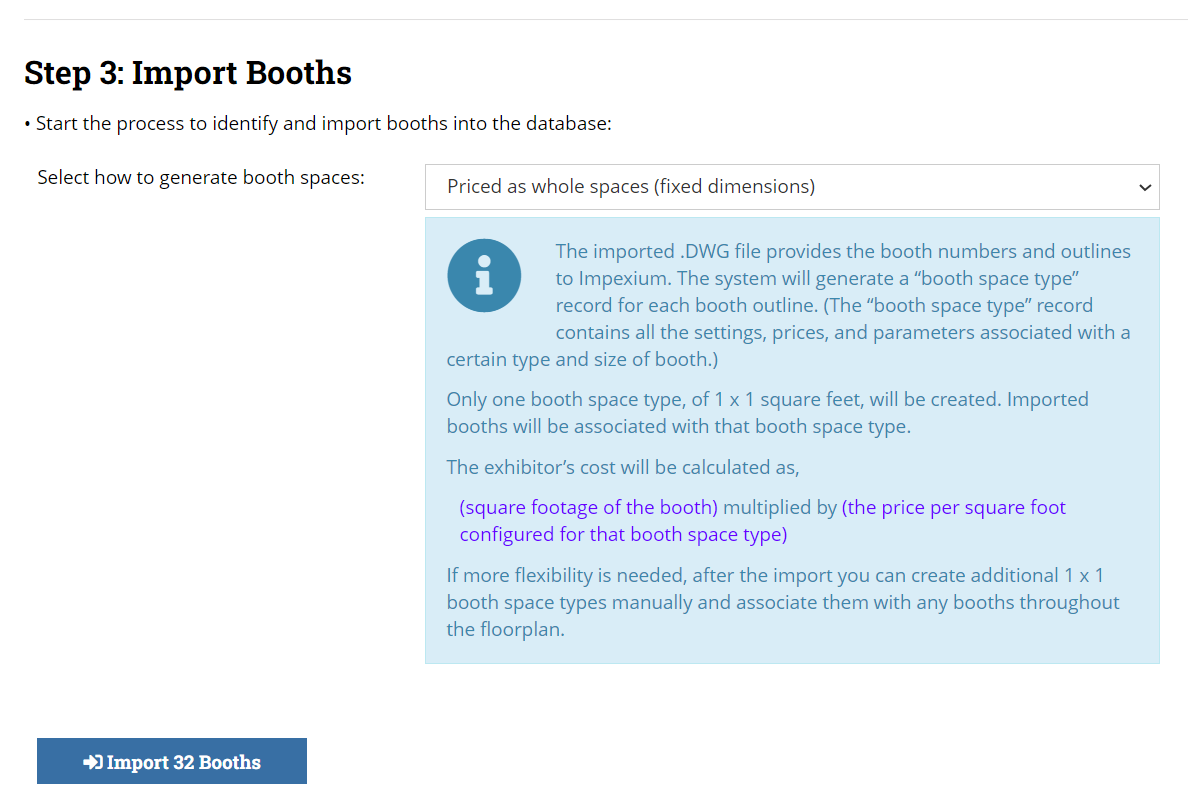
Step 3: Select “Priced as whole spaces” in the drop down box and then the blue “import booths” button in the bottom left hand corner. The number of imported booths should mirror the number of booths on the DWG file. (check with Vendor Management team to confirm accuracy of number.)
Once imported, the pricing will need to be set up per booth. You may do so by selecting the “Planning” tab and “Booth Spaces” on the left menu. Select “edit” next to the Booth space to enter pricing. NOTE: Pricing for booths are not set up under the “PRICES” tab on the top menu. It is mandatory to set them up on the actual booth space itself.
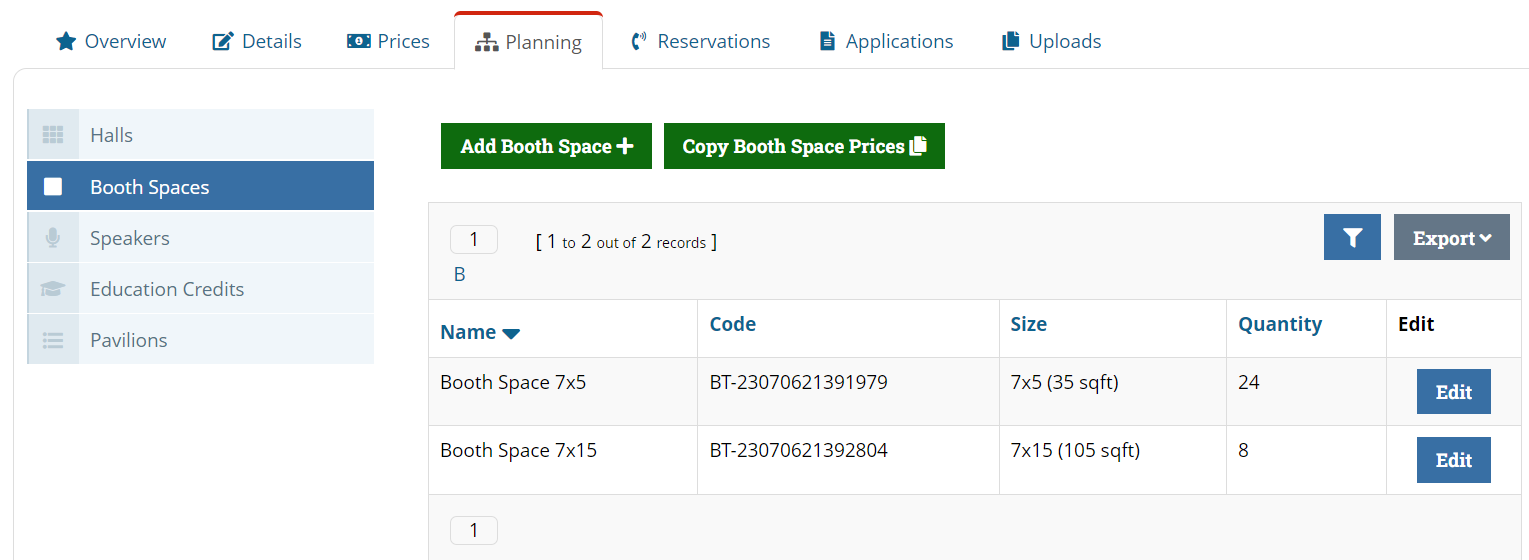
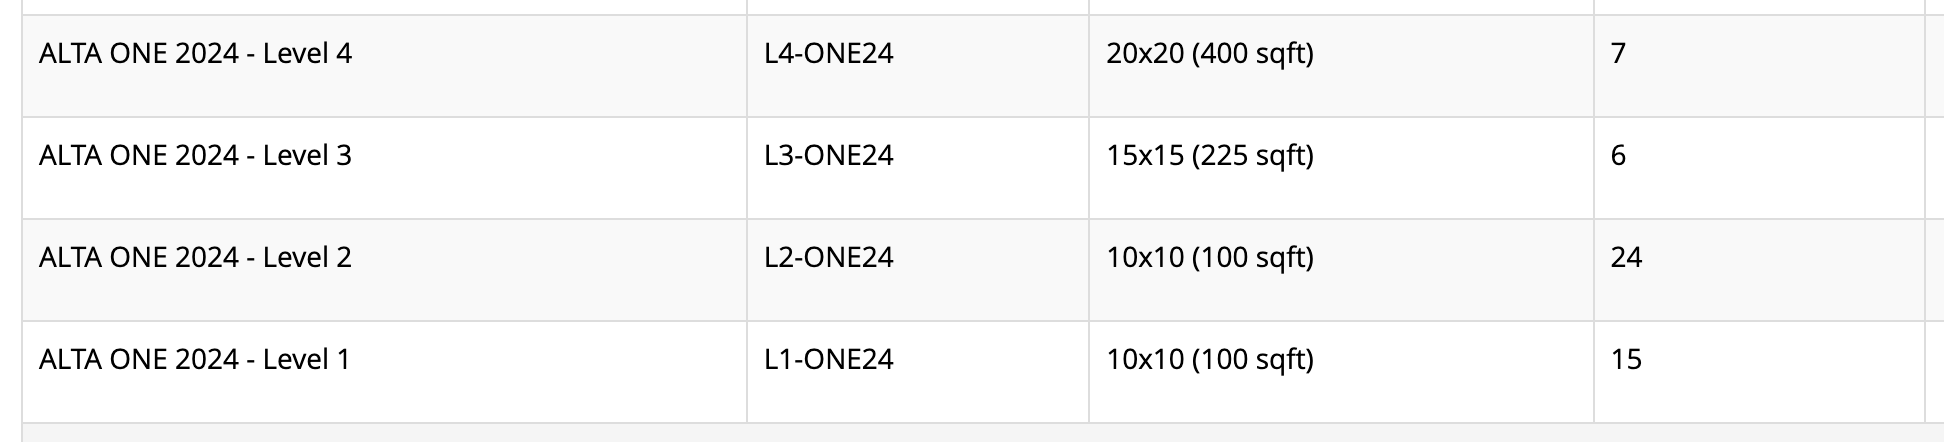
The Names and Codes imported should then also be adjusted to standard specs, which also include the name and coding so that they are unique across products, and clear for purchasers in invoices as well as clear for us in Reports. See below for screen shots of the standards.
Descriptions and Email Templates should also be setup, best by copy/paste field by field from “last year’s” setup.

Manually Adding Booths after Floorplan Import
It is also possible to Add booths that are not on the Floorplan, or not even use a floor plan. Booths cannot be added to a visual floorplan once it’s imported. But Booths SHOULD be added to the system for accounting, tracking, and assignment purposes when necessary. (Rather than the alternate way that was done for ALTA ONE 2023.) In order to do this, you simple hit “Edit” from the “Hall” and you will be taken to a full list of all of the Booths already setup from the Floorplan import, but ALSO have the ability to manually ad them with any numbering, etc. all using the same booth sizes as the others do. (See ALTA ONE 2023 for how the 39.X booths were added.)
Adding Prices
Like any re:Members (formerly Impexium) product, Prices must be setup. These are in the BOOTH setup, not the Exhibit setup. The 4 accounting codes should be copied from the prior year.
Within each Booth, you must start from scratch, however, if there are multiple prices for a single booth type (early, regular, late, etc.) then after one is built, others can be created via Copy.